How to Connect Your PlayStation VR2 Headset to a PC: Step-by-Step Guide
Author : Natalie
May 26,2025
For PlayStation VR2 enthusiasts eager to tap into the vast world of SteamVR games on a gaming PC, the wait for a seamless connection has been frustratingly long. However, Sony has come to the rescue with a $60 adapter released last fall, enabling PS VR2 owners to hook their headset up to any modern gaming PC, provided it meets the headset's minimum specifications. Yet, setting up the PS VR2 with a PC isn't just a matter of plugging in the adapter and diving straight into the action. Despite its plug-and-play marketing, certain built-in feature omissions mean you might need to do some extra legwork, depending on your PC's setup.
How to Connect to Your PC With the Adapter
Before you jump into the setup process, it's crucial to ensure you have all the necessary components. The PS VR2, when connected via the adapter, is fully compatible with the majority of SteamVR games. You'll need to confirm that your PC has Bluetooth 4.0 capabilities, a spare DisplayPort 1.4 cable, access to an AC power outlet, and both the PlayStation VR2 and SteamVR apps installed on Steam. The PS VR2's Sense controllers require USB-C charging ports and cables for recharging, although Sony offers a $50 charging station that makes this process much more straightforward.
What You'll Need
Before you start, check if your gaming PC is compatible with the PlayStation VR2 headset by visiting Sony’s official PS VR2 PC Adapter preparation page. If your system passes the test, gather the following items:
- A PlayStation VR2 headset
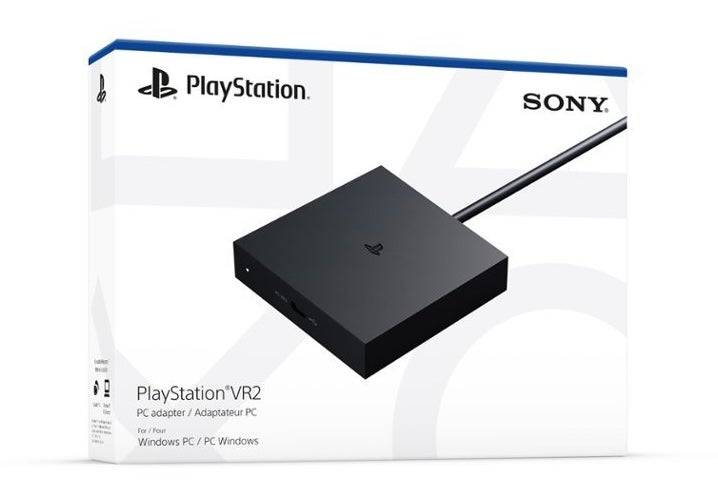
- The PlayStation VR2 PC adapter (comes with an AC adapter and male USB 3.0 Type-A cable)
- A DisplayPort 1.4 cable (purchased separately)
- A free USB 3.0 Type-A port on your PC (Sony advises against using an extension cable or external hub, though a powered external hub worked fine in our testing)
- Bluetooth 4.0 capability on your PC (either built-in or via an external adapter)
- Steam and SteamVR installed on your PC
- The PlayStation VR2 app installed within Steam
How to Connect: Step-by-Step Instructions
With all your gear ready, follow these steps to connect your PS VR2 to your PC:
- Install SteamVR and the PlayStation VR2 app: If you haven't already, download and install the Steam Windows client. Once Steam is installed, open it and install the SteamVR app. Next, download and install the PlayStation VR2 app.
- Set up your PC’s Bluetooth and pair your Sense Controllers: Navigate to Settings > Bluetooth & devices from your PC’s start menu, and toggle Bluetooth to "On." To pair your Sense controllers, hold down the PlayStation button and Create button on each until the white light at the bottom blinks. Then, on your PC's Bluetooth & devices page, click "Add device," select "Bluetooth," and connect the PlayStation VR2 Sense Controller (L) and (R). If your PC lacks built-in Bluetooth 4.0, use a compatible adapter like the Asus BT500. For systems with a built-in Bluetooth radio, disable the internal driver via Device Manager to use an external adapter.
- Set up the adapter and connect it to your PC: Plug the PS VR2 adapter into an unused USB 3.0 Type-A port on your PC. Use a DisplayPort 1.4 cable to connect the adapter to a free DisplayPort slot on your GPU. Connect the AC power adapter to the PS VR2 adapter's DC IN connector and plug it into an electrical outlet. Once powered, the adapter's status indicator will turn solid red. Finally, connect the PlayStation VR2 to the PC adapter via the USB-C port on the front of the adapter.
- Turn off Hardware-accelerated GPU scheduling (optional): If your PC has a newer GPU like a 40-series Nvidia RTX card, you might need to disable Hardware-accelerated GPU scheduling for a smoother VR experience. Go to Settings > System > Display > Graphics, click "Default graphics settings," and turn off the "Hardware-accelerated GPU scheduling" slider. Restart your PC.
- Launch the PlayStation VR2 App and SteamVR: Turn on your PlayStation VR2 headset by holding down the central button underneath the visor until it vibrates. Open SteamVR and set it as your default OpenXR runtime. From your desktop, open the PlayStation VR2 app to update your Sense controllers' firmware and set up your Play Area and other preferences. Follow the on-screen and in-headset instructions to adjust your IPD, display distance, and headset fit. Once everything is set up, you're ready to explore SteamVR games!
Can You Connect to PC Without an Adapter?
Currently, connecting the PS VR2 to a PC without the adapter is uncertain. The definitive answer is no, but according to Road to VR, some GPUs from 2018 with a USB-C port and VirtualLink feature might allow a direct connection, provided the PlayStation VR2 app is installed. However, this workaround is not officially supported and may not be reliable for all users.
Latest Articles
South Park Creators Trey Parker and Matt Stone Reportedly Enlist the Services of a 'Bulldog Negotiator' as Row Over Reported $3 Billion Deal Threatens Season 27 Release Date
The planned premiere of South Park Season 27 is now in jeopardy as series creators Trey Parker and Matt Stone, Paramount Global, and new studio owner Skydance clash over a proposed $3 billion deal.
Earlier this month, Parker and Stone voiced their fr
Alien: Earth Trailer Reveals Xenomorph, Nods to Scott's Original
The latest trailer for Alien: Earth has surfaced online, giving fans their most detailed glimpse yet of the highly anticipated TV series.Shared by @CineGeekNews on X/Twitter, this special preview debuted at Disney's 2025 Shareholder Meeting. It follo
LEGO Legend of Zelda: Ocarina of Time Final Battle Set Leaks, Features Link and Zelda Fighting Ganon
LEGO's upcoming The Legend of Zelda: Ocarina of Time set, showcasing Link and Zelda’s epic final showdown with Ganon, has surfaced online with pricing and release information.
The Final Battle will be a 1,003-piece model launching on March 1, accordi
Gunn Champions Superman and Fantastic Four Coexistence
This summer, two highly anticipated superhero movies will compete at the box office, with the DC Universe's "Superman" reboot premiering on July 11, followed by the Marvel Cinematic Universe’s "The Fantastic Four: First Steps" on July 25. While DC an
Monster Hunter Wilds 1.011 Update Details May 28
Monster Hunter Wilds game director Yuya Tokuda has unveiled the highlights of the upcoming Ver. 1.011 update launching May 28, featuring "numerous new additions and gameplay enhancements, including a special crossover event with Street Fighter 6."In
Konami Press Start Live June 2025: Everything Announced
Metal Gear Solid publisher Konami is back with a bang, and to prove it, they hosted a livestream showcase on June 12 called Konami Press Start Live.
The half-hour-long livestream featured game updates and appearances from Konami developers and produc
Latest Games

Zombie Rush
Arcade丨19.75MB

Casino Land Mod
Puzzle丨70.00M

ZomBees - Shooter
Casual丨117.5 MB

101 Okey Plus
Board丨119.83MB

The Sunset Fairies
Casual丨257.83M
Pictoword: Fun Brain Word Game
Word丨111.08MB
Rummy Plus Card Game
Card丨29.01MB

Dungeon Raid
Role Playing丨135.57MB
Connect Me
Puzzle丨3.39MB
Trending Games
MORE +


![Salvation in Nightmare [v0.4.4]](https://imgs.21qcq.com/uploads/36/1719555347667e551321c26.jpg)
Top News
MORE +
01
03-28
Top Streaming Platforms for Live Sports in 2025
Gone are the days when watching sports was as simple as turning on your TV and tuning into the big game. Today, the landscape of sports streaming has become a complex web of regional blackouts, paywalls, and exclusive rights that can leave fans feeling lost. With numerous streaming services vying fo
02
12-25
Vienna Opera Delight: Reverse 1.99 Update
Reverse: 1999 Version 1.7 Update: A Viennese Adventure Awaits!
Bluepoch Games' Reverse: 1999 is taking players on a trip back in time with its latest update, Version 1.7, launching players into the captivating world of early 20th-century Vienna in the new "E Lucevan Le Stelle" event. This update del
03
11-13
Black Myth: Wukong Review Impresses Amid Guideline Debate
After four long years of waiting since its first announcement in 2020, the verdict is in for Black Myth: Wukong! Read more to learn more about the details and what other reviewers thought about the game.Black Myth: Wukong Is Almost HereBut Only On PCEver since its first trailer back in 2020, Black M
04
01-23
“Descenders” Codes Unlock January 2025 Content
Descenders: A Thrilling Bike Racing Game with Active Codes!
Descenders delivers exhilarating bike racing action and boasts impressive reviews. Explore diverse locations, perform daring stunts, and choose from a wide variety of bikes and gear. Realistic bike physics make riding and pulling off tric
05
02-02
Roblox Grace Commands Guide Released
Grace Roblox Game Commands: A Comprehensive Guide
Grace is a challenging Roblox experience featuring terrifying entities and demanding levels. To aid players, especially during testing, a set of in-game commands is available on test servers. This guide details all commands and their usage.
All Grac