"Ultimate Tower Blitz: Eternal Tier List Update"
Author : Violet
Apr 17,2025
In *Tower Blitz*, you begin with a single type of tower, but as you progress, you unlock an array of towers, each with unique strengths and weaknesses. To help you tailor your strategy to your play style, here's a comprehensive tier list ranking all the towers in *Tower Blitz* from S-Tier to D-Tier, based on their abilities, upgrade paths, cost, and overall efficiency.
All Towers in Tower Blitz Ranked
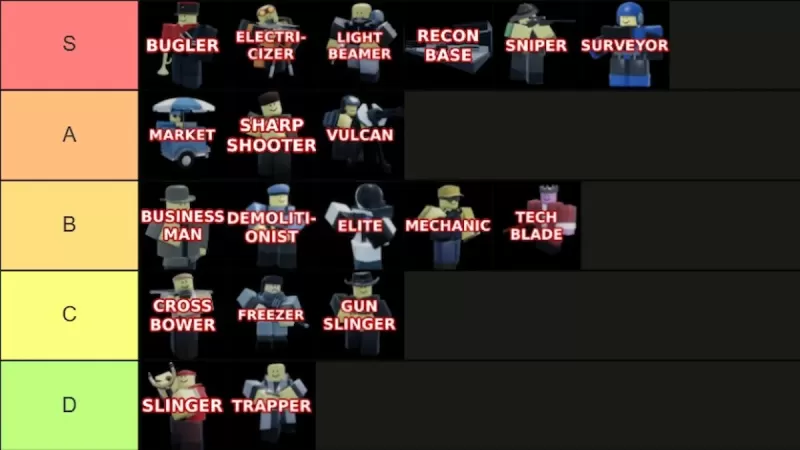
Our rankings categorize the towers from S-Tier, the top performers that almost guarantee a win on any map, to D-Tier, the least effective towers with limited utility. A-Tier towers are still strong but have noticeable flaws, while B-Tier towers offer average performance. C-Tier towers are generally underwhelming but can have niche uses, and D-Tier towers are the weakest, offering little to no strategic value. Below, we delve into the specifics of each tier.
S-Tier Towers
| Tower | Cost | Explanation | Pros and Cons |
|---|---|---|---|
 | To unlock the tower: **2500 Tokens** (available at Level 25) To place in-game: **750 Cash** | Overall, this tower is overpowered. Although it's a support tower, it's almost essential in Expert mode. It works wonders in any setup, especially when paired with the right towers. Note that Bugler cannot buff Recon Bases. | + Significantly boosts other towers' performances + Essential in Expert mode – Exclusively a support tower |
 | To unlock the tower: **5500 Tokens** To place in-game: **3800 Cash** | Ideal for those who enjoy a Sniper but seek something more powerful. It boasts the largest range and damage in the game. Position it near the end of the map to effectively eliminate all approaching enemies. | + Offers immense power and range + Versatile with both support and damage capabilities – High cost |
 | To unlock the tower: **Complete the contract** To place in-game: **1800 Cash** | Similar to Electricizer, Lightbeamer is one of the strongest towers in the game. Position it along a straight path to maximize its death ray's effectiveness. Both upgrade paths are excellent, making this tower a game-changer with proper placement. | + Extremely powerful + Effective for crowd control – Not viable early in the game – Expensive |
 | To unlock the tower: **8000 Tokens** (available at Level 45) To place in-game: **1000 Cash** | A fantastic value, spawning multiple units for the price of one. These operatives fight on your side and grow stronger with upgrades. We prefer the top path, but the bottom is also impressive. Despite the high upgrade costs, Recon Base is key to winning on any difficulty except Normal. | + Continuously spawns units + Both upgrade paths are powerful + Ideal for Expert mode – Very expensive upgrades |
 | To unlock the tower: **1500 Tokens** To place in-game: **500 Cash** | Undoubtedly the best early-game tower. While some consider it slow, the bottom path can address this issue. Its unique ability to remain effective from early to late game, especially on Expert, sets it apart from other early-game towers. | + Top early-game performer + Usable throughout the game + High piercing damage – Slightly slow |
 | To unlock the tower: **Complete the contract** To place in-game: **700 Cash** | This tower is highly versatile. Opt for the top path for support or the bottom for damage. Its flexibility allows it to be effective from the start to the end of a round, playing a crucial role in your strategy. | + Highly versatile + Effective throughout the game – Limited to four placements |
A-Tier Towers
| Tower | Cost | Explanation | Pros and Cons |
|---|---|---|---|
 | To unlock the tower: **1000 Tokens** To place in-game: **650 Cash** | A great tower if you master it. Players often get caught up in the bottom path's investment, only to realize they're losing money. We recommend the top path, which focuses on generating income, the tower's primary purpose. | + Essential in all games, especially multiplayer + Profitable – Bottom path is less effective – Slow initial income generation |
 | To unlock the tower: **1300 Tokens** To place in-game: **600 Cash** | An excellent early-game tower for managing groups of enemies. Its range covers early-game needs, though its piercing damage is moderate. Position it in an unobstructed spot to smoothly transition into the mid-game. | + Effective for crowd control and damage + Ideal for beginners – Less effective in Expert mode – Low defense piercing |
 | To unlock the tower: **3000 Tokens** To place in-game: **2500 Cash** | A solid choice for mid to late game. You can choose to attack multiple enemies or focus on increasing its strength. The latter is more beneficial, showcasing the tower's full potential. Don't be discouraged by its initial damage; the bottom path at max level offers 140 DPS and full defense pierce. | + Highly effective + Versatile – Slow to reach full strength – No flying detection |
B-Tier Towers
| Tower | Cost | Explanation | Pros and Cons |
|---|---|---|---|
 | To unlock the tower: **Complete the contract** To place in-game: **800 Cash** | This tower helps farm money without a Market and also deals damage. It pairs well with Recon Base but is easily outclassed by other options. The Market is more efficient for income, and other towers offer superior damage capabilities. | + Generates income and deals damage + Suitable for early game – Easily replaceable |
 | To unlock the tower: **3500 Tokens** To place in-game: **900 Cash** | Effective early-game tower for managing enemy groups with high piercing damage. However, as the game progresses, more efficient options emerge, quickly rendering Demolitionist obsolete. It also lacks flying detection. | + Good for crowd control and piercing damage – Limited to early game – No flying detection |
 | To unlock the tower: **Complete the contract** To place in-game: **1200 Cash** | Similar to Vulcan but less versatile. The bottom path maximizes its potential, but be mindful of its long cooldown, which affects its usability. | + Effective bottom path – Long cooldown – Expensive |
 | To unlock the tower: **Complete the contract** To place in-game: **480 Cash** | Useful in mid-game, but not before or after. While it offers various turrets, only the Teslas make a significant impact, and that's limited to certain enemies. Despite its strategic value for some, it's costly. | + Effective in mid-game – Cost-inefficient |
 | To unlock the tower: **Free** (available at Level 10) To place in-game: **400 Cash** | A Melee tower effective against groups and early-game enemies, including tanks. Its potential is hindered by its short range and slow speed, which are critical drawbacks for a melee unit. | + Effective for crowd control + Efficient early in the game – Limited range – Slow |
C-Tier Towers
| Tower | Cost | Explanation | Pros and Cons |
|---|---|---|---|
 | To unlock the tower: **200 Tokens** To place in-game: **400 Cash** | A decent choice for beginners or as an early-game alternative to Slinger. While it offers long range and can handle groups, its damage output remains disappointingly low even after upgrades. | + Affordable and suitable for beginners + Long range – Ineffective post-early game – Low damage |
 | To unlock the tower: **450 Tokens** To place in-game: **400 Cash** | Effective when paired with high-DPS towers, but by the time you can combine towers, better options exist. It's good against fast enemies but becomes obsolete once enemies develop freeze immunity. | + Effective against fast enemies – Becomes obsolete post-early game – Limited to certain enemies |
 | To unlock the tower: **500 Tokens** To place in-game: **400 Cash** | Another Melee tower that's too slow for the influx of enemies. Its short range can be improved by the top path, but this reduces its already low damage. It's only viable in Normal difficulty. | + Decent top path – Limited range – Ineffective in Hard or Expert modes |
D-Tier Towers
| Tower | Cost | Explanation | Pros and Cons |
|---|---|---|---|
 | To unlock the tower: **Free** To place in-game: **200 Cash** | Designed for beginners, Slinger introduces new players to the game but offers little beyond that. Use it in the first wave and replace it as soon as possible due to its poor performance. | + Free – Extremely low damage and slow firing rate, even at max level – Useless after the first few waves |
 | To unlock the tower: **1000 Tokens** (available at Level 10) To place in-game: **500 Cash** | Despite its unlock cost and level requirement, Trapper struggles against even the weakest enemies. There's no justification for using it when more effective and cheaper towers are available. | + Decent bottom path – Not cost-efficient – Often nearly unusable – Struggles throughout the game |
With this detailed tier list of all the towers in *Tower Blitz*, you're now equipped to devise the best strategy for your play style. If you're looking for a boost at the start of your game, our *Tower Blitz* codes can give you an edge.
Latest Articles
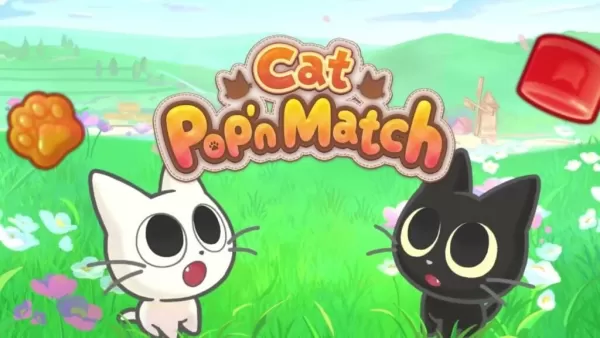
Ash & Snow Launches Cat Pop'n Match Game
The mobile market is no stranger to match-3 games. Yet, a compelling premise paired with a generous dose of charm is always worth a look. I'm happy to report that Ash & Snow: Cat Pop'n Match fits that description perfectly.What Is Ash & Snow: Cat Pop
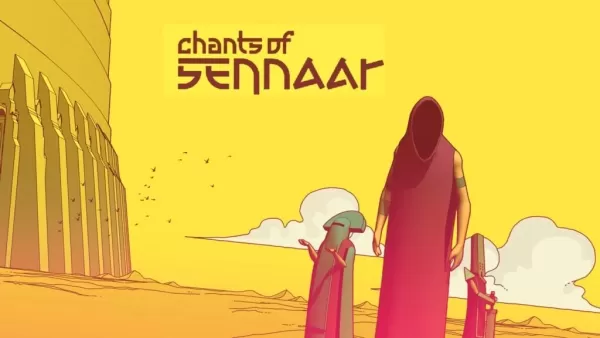
Chants of Sennaar: Decode Tongues in Babel's Tower
Chants of Sennaar is now available on mobile devices! Created by Rundisc and released on mobile by Playdigious, the game takes cues from titles like Heaven’s Vault and Captain Blood. It originally launched in September 2023 for Nintendo Switch, PlayS
Fallout Shelter Rolls Out Seasons, the Debut Season Being Viva New Vegas!
Bethesda Softworks has introduced a new feature for Fallout Shelter called Seasons. In its first season, Fallout Shelter brings you Viva New Vegas — the same world featured in the second season of Amazon Prime’s Fallout TV series.
Viva New Vegas mark
How Long is Death Stranding 2?
Death Stranding 2: On the Beach is now out on PS5, offering a vast trek across Australia as Sam Porter Bridges works to link the continent to the Chiral Network. But how long does it actually take? We’ll break down exactly how many hours different IG
Persona 4 Release Officially Confirmed at Xbox Event
After months of speculation and leaks, Atlus has officially confirmed the development of a Persona 4 remake.PlayA short reveal trailer gave us our first glimpse of Persona 4 Revival, coming to Xbox, PS5, and PC. It will be available on Game Pass from
Rail Rescue: Fun and Challenging Puzzles Coming Soon
Rail Rescue: Puzzle Lines is set to launch on mobile devices on June 30th Featuring 500 levels at release, players must draw rail lines to save adorable cartoon characters Rebuild your town and engage with unique residents to uncover their personal stories and hidden secrets It’s fascinating to s
Latest Games

Survival 456 But It's Impostor
Action丨69.16MB

SWAT Counter Terrorist
Action丨46.09M

Hollywood's Bleeding
Casual丨72.30M

Quiz filmes terror(Scary Quiz)
Trivia丨32.3 MB

はぐるまのまち -放置で回る癒しのゲーム
Casual丨77.9 MB


Tower Defense War
Strategy丨86.2 MB

NBA Live Asia
Sports丨152.1 MB
Trending Games
MORE +


![Salvation in Nightmare [v0.4.4]](https://imgs.21qcq.com/uploads/36/1719555347667e551321c26.jpg)
Top News
MORE +
01
03-28
Top Streaming Platforms for Live Sports in 2025
Gone are the days when watching sports was as simple as turning on your TV and tuning into the big game. Today, the landscape of sports streaming has become a complex web of regional blackouts, paywalls, and exclusive rights that can leave fans feeling lost. With numerous streaming services vying fo
02
12-25
Vienna Opera Delight: Reverse 1.99 Update
Reverse: 1999 Version 1.7 Update: A Viennese Adventure Awaits!
Bluepoch Games' Reverse: 1999 is taking players on a trip back in time with its latest update, Version 1.7, launching players into the captivating world of early 20th-century Vienna in the new "E Lucevan Le Stelle" event. This update del
03
11-13
Black Myth: Wukong Review Impresses Amid Guideline Debate
After four long years of waiting since its first announcement in 2020, the verdict is in for Black Myth: Wukong! Read more to learn more about the details and what other reviewers thought about the game.Black Myth: Wukong Is Almost HereBut Only On PCEver since its first trailer back in 2020, Black M
04
01-23
“Descenders” Codes Unlock January 2025 Content
Descenders: A Thrilling Bike Racing Game with Active Codes!
Descenders delivers exhilarating bike racing action and boasts impressive reviews. Explore diverse locations, perform daring stunts, and choose from a wide variety of bikes and gear. Realistic bike physics make riding and pulling off tric
05
02-02
Roblox Grace Commands Guide Released
Grace Roblox Game Commands: A Comprehensive Guide
Grace is a challenging Roblox experience featuring terrifying entities and demanding levels. To aid players, especially during testing, a set of in-game commands is available on test servers. This guide details all commands and their usage.
All Grac